
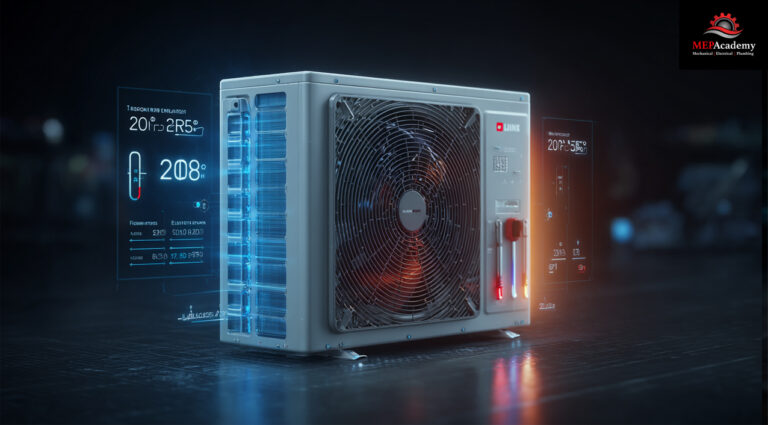
When an air conditioner develops high head pressure, overheats, or struggles to cool, one of the quickest diagnostic tools you can use is condenser Delta-T—the temperature rise across the condenser coil.
Condenser Delta-T offers immediate insight into how well the outdoor unit is rejecting heat. Both homeowners and HVAC technicians search for topics like:
- “Why is my AC running hot?”
- “High head pressure troubleshooting”
- “AC condenser temperature rise”
- “Condenser coil troubleshooting”
This guide explains everything you need to know about ΔT, including how to measure it and what it means when readings fall outside normal ranges.
What Is Condenser Delta-T?
Condenser Delta-T—often written as ΔT—is the difference between the air entering the condenser and the air leaving the top of the condenser fan.
Formula:
ΔT = Leaving Air Temperature – Entering Air Temperature
The condenser coil’s job is to reject heat from the refrigerant into the outdoor air. The hotter the air coming off the top of the unit, the more heat is being removed.
What’s a Normal Condenser ΔT?
Most residential AC systems operate with:
👉 Normal ΔT Range: 15°F – 25°F
This assumes:
- Clean coil
- Proper refrigerant charge
- Normal ambient outdoor temperature
- Correct fan operation
Some high-efficiency units may run slightly lower because of larger coil surface area, but the 15–25°F range applies to most systems.
Why Condenser Delta-T Matters
Condenser Delta-T is a diagnostic shortcut that helps you quickly identify major system problems, including:
- High head pressure. May be caused by an overcharged system, dirty condenser coil, or restricted airflow across the condenser.
- Coil restriction. May be caused by debris, bent fins, or internal blockage limiting refrigerant flow.
- Charge problems. May be caused by refrigerant leaks, improper charging, or incorrect system charge levels.
- Airflow issues. May be caused by clogged filters, blocked condenser intake, or undersized ductwork.
- Fan performance. May be caused by a weak, failing, or incorrectly rotating condenser fan motor.
- Dirty coils. May be caused by dust, pollen, grease, or environmental buildup preventing proper heat transfer.
- Non-condensables in the system. May be caused by poor evacuation practices allowing air or moisture to remain in the refrigerant lines.
- Recirculating hot discharge air. May be caused by locating the unit too close to walls, fences, or enclosures that push hot discharge air back into the condenser intake.
Because ΔT links directly to condenser performance, it’s one of the fastest ways to determine whether the unit is rejecting heat properly.
How To Measure Condenser ΔT (Step-by-Step)
You only need a temperature probe, temp gun, or digital thermometer.
1. Let the system run 10–15 minutes
This brings pressures and temperatures to steady operation.
2. Measure entering air temperature
Hold your probe at the side of the condenser coil.
Avoid taking readings near sunlight-heated panels.
3. Measure leaving air temperature
Take this measurement directly above the fan, in the middle of the airstream.
4. Subtract the readings
Leaving air minus entering air = ΔT.

Interpreting the Results: High ΔT vs Low ΔT
If ΔT Is Too High (Above 25°F)
This means the condenser is absorbing too much heat—often because heat cannot escape easily.
Possible causes:
- Dirty condenser coil
- Overcharge of refrigerant
- Failing/weak condenser fan motor
- Blocked air path around unit
- Hot discharge air recirculation
- High ambient temperature
- Non-condensables in system
- Undersized condenser for load
A high Delta-T almost always comes with high head pressure.
If ΔT Is Too Low (Under 15°F)
A low condenser temperature rise means not enough heat is being absorbed.
Possible causes:
- Low refrigerant charge
- Weak compressor
- Metering device issues or restriction
- Poor refrigerant flow
- Oversized condenser coil
- Internally fouled coil
If ΔT is low and pressures are low, undercharge is likely.
Real-World Examples
Example 1: Dirty Condenser Coil
- Entering: 88°F
- Leaving: 118°F
- ΔT = 30°F
- Head pressure high
Diagnosis: Heat rejection blocked → Clean the coil.
Example 2: Undercharged System
- Entering: 95°F
- Leaving: 105°F
- ΔT = 10°F
- Head pressure low
Diagnosis: System undercharged or restricted.
Example 3: Failed Fan Motor
- Entering: 90°F
- Leaving: 140°F
- ΔT = 50°F
Diagnosis: Fan not moving air → compressor in danger of overheating.
When You Should Check Condenser ΔT
Condenser delta-T should be measured when:
- The AC has high head pressure
- The unit is running hot
- The condenser fan sounds weak
- The coil looks dirty
- The homeowner says “the AC runs but doesn’t cool”
- You’re performing routine maintenance
- You want to confirm proper charge without relying only on gauges
It’s especially helpful during quick tune-ups and diagnostic calls.
Condenser ΔT Troubleshooting Summary
| Problem | ΔT | Symptoms | Likely Cause |
|---|---|---|---|
| Dirty coil | High (>25°F) | High head pressure | Blocked airflow |
| Overcharge | High | High head pressure | Too much refrigerant |
| Failed fan | Very high (>40°F) | Compressor hot | Weak or non-spinning fan |
| Undercharge | Low (<15°F) | Low head pressure | Low refrigerant |
| Restriction | Low | Frost, low suction | TXV/line blockage |
| Non-condensables | High | Erratic pressures | Improper evacuation |
Saturated Condensing Temperature (SCT)
While some technicians try to use the Saturated Condensing Temperature (SCT) from the refrigerant pressure–temperature chart to estimate condenser Delta-T, this method does not provide the true temperature rise of the air moving across the condenser coil. SCT is a refrigerant-side measurement based on high-side pressure and tells you the temperature of the refrigerant in the condenser—not the temperature of the air leaving the top of the unit. True condenser Delta-T is strictly an air-side measurement, requiring actual readings of the entering air and leaving air. Both methods are valuable, but they serve different purposes. Use air-side Delta-T to check condenser heat-rejection performance and diagnose airflow, coil cleanliness, and fan issues. Use SCT/PT-chart analysis to evaluate refrigerant charge, high-side pressures, and condenser efficiency through condensing temperature over ambient (CTOA). Together, they give a full picture, but they are not interchangeable.
Side-by-Side Comparison Table
Condenser Air-Side ΔT vs. SCT/PT-Chart Method
| Feature | Air-Side Condenser ΔT | Saturated Condensing Temperature (SCT) |
|---|---|---|
| What it measures | Temperature rise of air moving through the condenser | Temperature of refrigerant inside the condenser at saturation |
| How it’s measured | Entering air temp vs. leaving air temp | High-side pressure + PT chart conversion |
| Primary purpose | Evaluate heat rejection and airflow across condenser | Diagnose refrigerant charge, system pressures, and condenser load |
| Best for diagnosing | Dirty coils, airflow problems, bad fan motors, recirculation issues | Overcharge, undercharge, non-condensables, high head pressure |
| Normal expected values | 15°F–25°F temperature rise | Typically 15°F–30°F above ambient (condensing split) |
| Accuracy depends on | Proper probe placement and stable airflow | Accurate gauge readings and correct refrigerant PT data |
| Tells you about | Real-world condenser performance on the air side | Refrigerant behavior and thermodynamic state inside coil |
| Cannot determine | Refrigerant charge or internal pressures | Actual air temperature rise of the condenser airflow |
| When to use | During airflow diagnosis, PM tune-ups, coil troubleshooting | During refrigerant charging, efficiency checks, head pressure problems |
| Best used together? | YES | YES |
Condenser TD (Temperature Difference) – The Most Important Design and Diagnostic Parameter for Air-Cooled Condensers
Definition
Condenser TD = Saturated Condensing Temperature (SCT) − Entering Air Temperature (ambient or dry-bulb air entering the coil)
- Also called Condenser Temperature Split, Design Temperature Difference, or ITD (Initial Temperature Difference) in engineering literature.
- Expressed in °F or °C.
It tells you how many degrees the refrigerant must be above the outdoor air to reject the total heat of rejection (compressor work + evaporator load).
Why TD is More Important than Air ΔT
- Air ΔT (20–30°F) is just a symptom.
- Condenser TD is the actual driving force for heat transfer and is what the manufacturer designs around.
Typical Condenser TD Values by Application (Air-Cooled Systems)
| Application | Refrigerant | Typical Design TD | Common Real-World Operating TD | Notes |
|---|---|---|---|---|
| Residential A/C (standard efficiency) | R-410A, R-32, R-454B | 25–30°F | 22–35°F | Most 13–16 SEER units |
| High-efficiency residential (>17 SEER) | R-410A etc. | 15–22°F | 15–25°F | Oversized condensers, variable-speed |
| Light commercial (rooftops, splits) | R-410A, R-407C | 20–30°F | 20–35°F | Wider range because of wider load/ambient swings |
| Standard refrigeration (medium-temp) | R-404A, R-448A | 15–20°F | 12–25°F | Lower TD because lower heat of rejection |
| Low-temp refrigeration | R-404A etc. | 10–15°F | 10–20°F | Very low TD designs common |
Rule of thumb most manufacturers use for R-410A residential A/C: Design TD = 25–30°F at ARI/ISO rating conditions (95°F outdoor, 80°F/67°F indoor).
What Happens When TD Deviates
| Measured TD | Likely Cause(s) | Effect on System |
|---|---|---|
| < 15°F | • Very low ambient • Over-sized condenser • Low airflow (fan too fast) • Undercharged • Low indoor load | Low head pressure, possible poor capacity |
| 15–20°F | High-efficiency unit, good conditions, or slightly low load/airflow | Usually ideal for high-efficiency units |
| 20–30°F | Normal operating range for most systems | Expected |
| 30–40°F | • Dirty coil • Slightly low condenser airflow • Mildly overcharged • High ambient + high load | Higher energy use, still functional |
| > 40°F | • Severely dirty/blocked coil • Very low airflow (bad fan motor, blocked coil) • Grossly overcharged • Non-condensables • Recirculation of hot air | High head pressure, compressor stress, trips, short life |
Relationship Between Condenser TD and Air ΔT
There is no fixed mathematical relationship because it depends on coil design, airflow, and refrigerant glide, but in practice:
| Condenser TD | Typical Air ΔT (R-410A residential) |
|---|---|
| 15°F | 15–20°F |
| 20°F | 18–24°F |
| 25°F | 22–28°F |
| 30°F | 25–32°F |
| 35°F+ | 30°F+ |
High-efficiency units with big coils and variable-speed fans can have TD = 15–18°F but still show air ΔT = 22–26°F — this is normal and desirable.
How to Measure Condenser TD in the Field (Correct Procedure)
- Measure ambient air temperature entering the coil (not in the sun, not in the discharge airstream).
- Measure liquid line temperature ~6 inches before the metering device or at the service valve.
- Convert measured liquid pressure to saturated condensing temperature (SCT) using PT chart for that refrigerant.
- Subtract: TD = SCT − Ambient.
Example (R-410A):
- Outdoor temp = 95°F
- High-side pressure = 410 psig → SCT = 120°F (from PT chart)
- TD = 120 − 95 = 25°F → perfect, normal operation.
Key Takeaways – Condenser TD
- It is the primary diagnostic number for the high side.
- 20–30°F is normal for most residential/commercial R-410A systems.
- High-efficiency units intentionally run 15–22°F TD.
- Refrigeration runs even lower (10–20°F).
- If TD is >35–40°F, something is seriously wrong on the high side (dirty coil, low airflow, overcharge, non-condensables).
- Never judge the high side by air temperature rise alone — always calculate TD.
Master condenser TD and you can diagnose 90% of high-side problems in under two minutes with just a set of gauges and a thermometer.
Diagnosing a Sick System vs. a Sick Person
When your kid feels hot, you put your hand on their forehead. It’s quick, it’s easy — and it’s usually close enough to know something’s wrong. But when the pediatrician walks in, she doesn’t trust your palm. She slides a thermometer under the tongue or into the ear and gets an exact core temperature. That number tells her whether it’s a mild bug or time to start antibiotics.
An air-cooled condenser is the same “patient.”
- Touching the forehead = sticking your thermometer into the discharge air leaving the coil. It’ll feel “hot” when the system has a fever, but you have almost no idea how high the real fever actually is.
- Taking the real temperature = putting gauges on the high-side service port, converting pressure to saturated condensing temperature (SCT), and calculating true condenser TD. That’s the core body temperature of the refrigeration circuit — the only number that tells you exactly how sick (or healthy) the high side really is.
Most techs spend their careers feeling foreheads with a temperature gun pointed at the leaving air. The good ones pull out the gauges and take the patient’s real temperature.
Your condenser doesn’t care how hot the air feels blowing out the top — it only cares how many degrees the refrigerant is above ambient. Don’t guess the fever. Measure it.
“Stop feeling the forehead. Take the real temperature.”
Conclusion
Understanding condenser Delta-T is one of the fastest and most reliable ways to diagnose high head pressure, weak cooling, and overheating AC units. By measuring the temperature rise across the condenser, you instantly get insight into airflow issues, refrigerant charge problems, and coil performance.
Whether you’re a homeowner trying to understand why your AC is running hot or an HVAC technician looking for a quick diagnostic tool, condenser ΔT is an essential part of troubleshooting.