Chapter #6 – Sheet Metal Seams
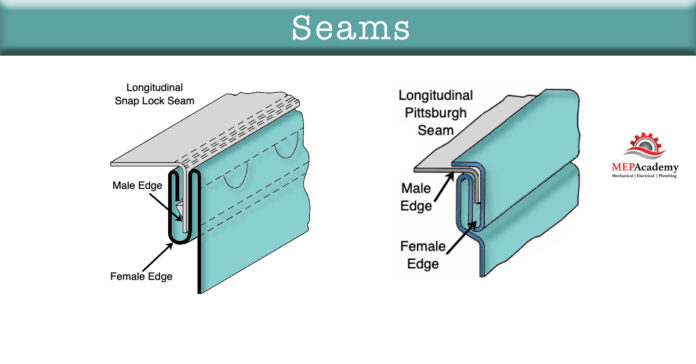
Seams run longitudinal along the length of the duct run, while joints run transverse (across). Seams run parallel to the air flow, while joints are perpendicular to the air flow. The seams hold together the duct or section of a single fitting as opposed to a joint that connects two separate pieces together. The seam is highlighted in the below image.
Each section of duct can have 1 to 4 seams depending on how large the duct is. Really large ducts and fittings can have more than 4 seams as required to provide strength and span wide areas, but in most cases there will be 1 or 2 seams.

Snap Lock and the Pittsburgh seam are the most typical seams used or specified in the HVAC commercial construction industry that we have witnessed. We show them here with a few others.

Standing Seams
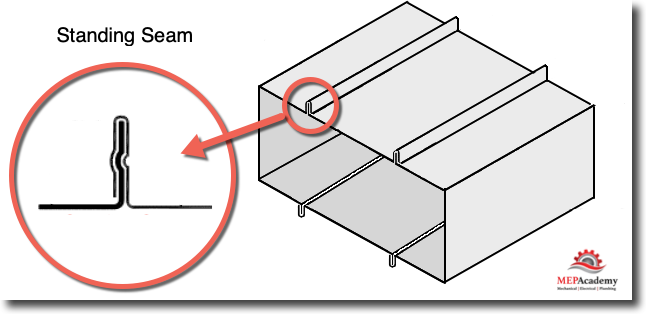
When ducts get too wide they could require an additional seam to add strength and span the greater distances. The use of a standing seam provides strengthening for the larger ducts. Depending on the size of the duct, the standing seam will extend upward either by 1 inch or 1-1/2 inches.
Pittsburgh Seams
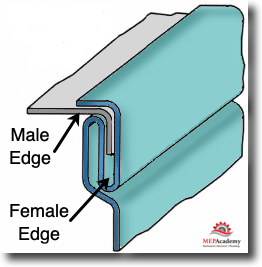
The Pittsburgh seam is used for pressure classes and duct sizes larger than the Snap Lock seam can handle. The Pittsburgh seam comes in small and large sizes depending on the pressure requirements of the ductwork.
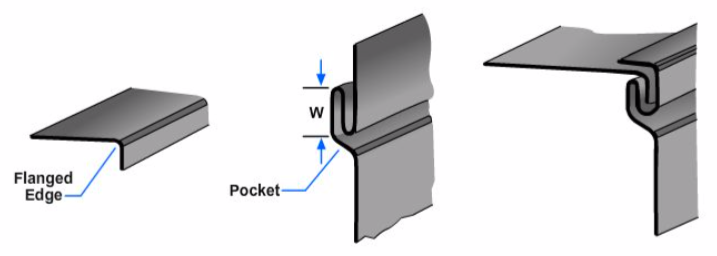
To lock the two ends of the Pittsburgh seam together it is run through a Pittsburgh Lock machine that folds over the standing lip, effectively locking the two pieces together. If the fabrication shop doesn’t have an automatic Pittsburgh seam machine then there are hand held models or it can be hammered over by a shop worker the old fashion way.
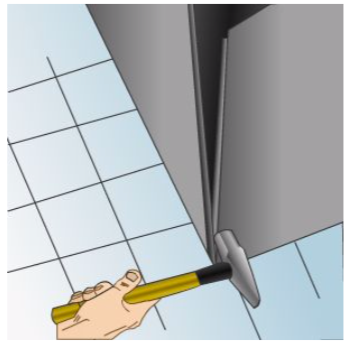
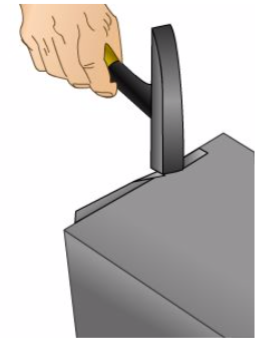
Pittsburgh Seam on Ductwork
Here is a video of a hand held Pittsburgh seam closer.
Pittsburgh Seam on a Fitting
This next video shows a sheet metal fabrication shop worker using Pittsburg seams on an elbow.
Button Punch Snap Lock
A Snap-lock roll forming machine will be one of the shop fabrication machines that gets highly used, as this makes the seam for the smaller, low pressure ductwork and fittings. Each piece gets one of its ends rolled to form basically a male and female longitudinal seam connection that gets knocked together and locked in place. The pieces are then bent to form an “L” shape in the case of a two piece fitting. Larger pieces may require four pieces to make the fitting.
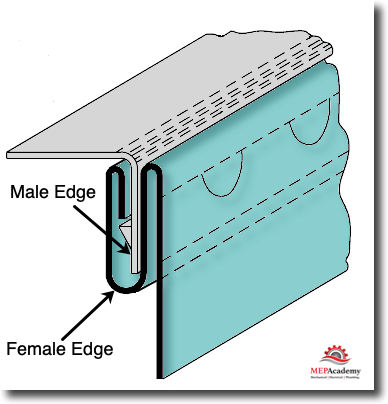
These machine vary on their production. Somewhere around 60 feet per minute for the seam.
Watch the video below to see how quickly this seam is made and assembled.
Welded Seams
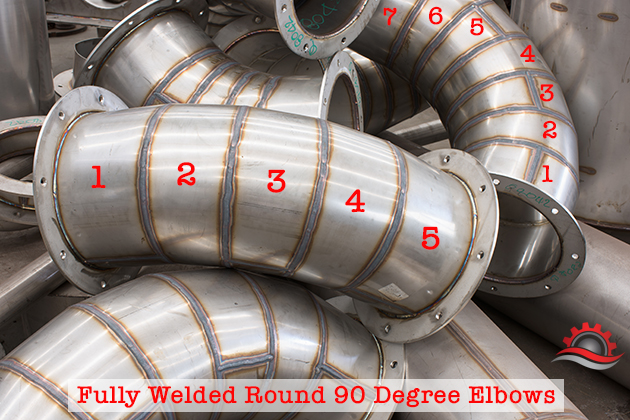
For duct systems requiring a heavier duty seam as can be found in some lab exhaust systems, the seam can be fully welded longitudinally. A piece of sheet metal will be cut to the proper width based on the circumference of the round size required and then put through a roller to shape the metal into a circular pattern. The longitudinal seams will be held together as the seam is welded. The ends can have a flange welded on so section of straight round duct can be fasten together or to a fitting with a flange.
Grooved Seams

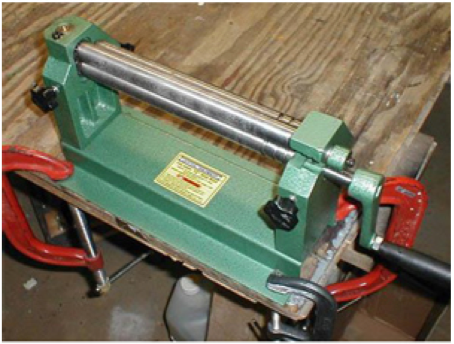
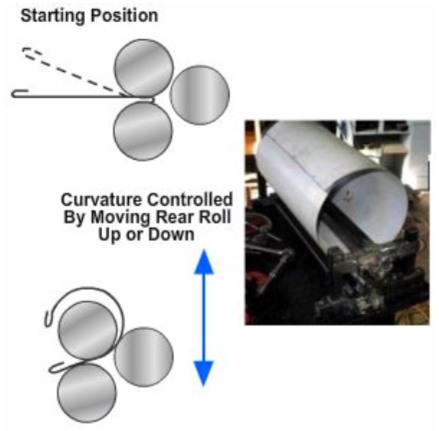
As shown below the metal is slipped into the roller and then it’s rotated around the three rollers. To make a greater or small circumference you adjust the position of the back roller.
Now let’s look at chapter #7 to see how to make a sheet metal Joints.
- Chapter #1 – Introduction to Sheet Shop Fabrication
- Chapter #2 – Sheet Metal Materials
- Chapter #3 – Sheet Metal Coil Line
- Chapter #4 – Plasma Cutting Table
- Chapter #5 – Spiral Machine
- Chapter #6 – Sheet Metal Seams
- Chapter #7 – Sheet Metal Joints
- Chapter #8 – Sheet Metal Casings and Plenums
- Chapter #9 – Sheet Metal Shop Fabrication Productivity


