Chapter #4 – Sheet Metal Plasma Cutter
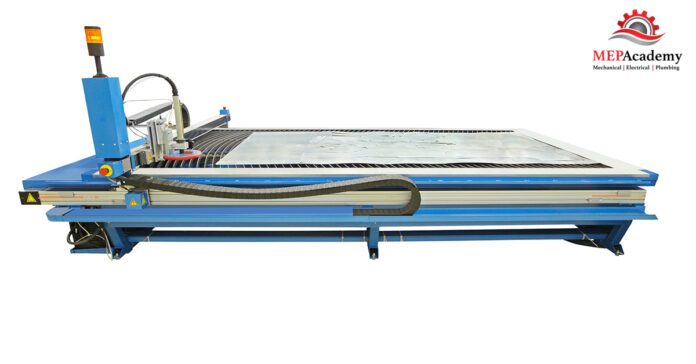
A plasma cutter is a large table where a piece of sheet metal is cut to make a fitting according to patterns setup in the shops fabrication software. The software optimizes the patterns to minimize wasting the material, any excess material scrap is placed into a recycle bin. A computer on the machine tells it how to cut each piece. This will help reduce your waste factor for those estimators that work with their shop foreman to figure how much waste to account for with the various pieces of equipment.
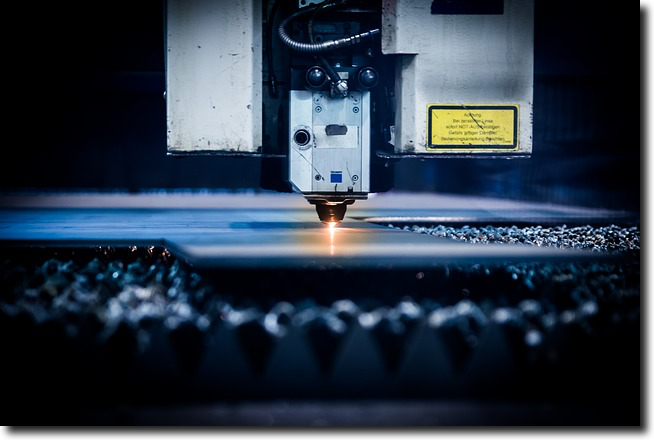
Some plasma cutters can cut up to 1-1/4” thick metal depending on the manufacture and model number of the cutter, but in the Heating Ventilating and Air Conditioning industry we won’t need that ability as most of what we need fabricated will fall between 26ga and 16ga.
The Plasma cutter is used to make fittings as straight duct will be made off a coil line which will discuss shortly. The size of the Plasma cutter table varies based on the shops requirement and the manufactures available models, sizes such as 5’ x 10’, 6’ x 10’, 5’ x 20’ and 6’ x 20’.
The Plasma cutter has an exhaust fan to remove the gas from the cutter. After the cutter has completed cutting the shapes, the sheet metal shop worker separates the shapes and puts the scraps in a bin for recycling. Each piece will have a sticker that gets slapped on it or marked by the shop worker that indicates many aspects of its assembly requirements and the project it’s being fabricated for.
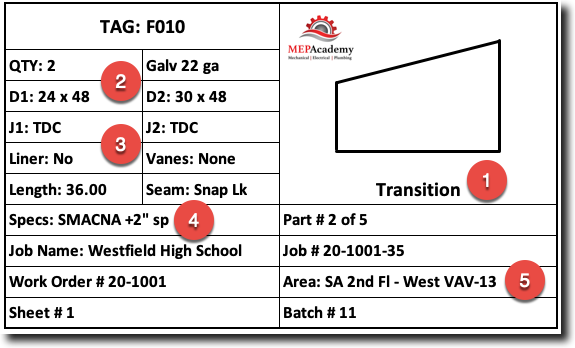
If a fabricated section has a sticker as shown below it will be applied to the cut piece. It will show a pictogram (#1) of the piece with its gage and dimensions (#2) and the joint and seam (#3) requirements, in addition to the job name and static pressure or specifications used (#4). Another important designation on the sticker is where the fitting is located (#5) in the building and what system it serves (Supply Air, 2nd Floor, West, VAV-13) This information will save on material handling, as it is clear from the label exactly where this fitting is to be installed within the building.
If you watched the video above you would have seen one of the fabrication shop personnel placing stickers on each piece.
Now that shapes have been cut by the plasma cutter the next step will be to make the seams and joints so that the pieces can be attached together to make a fitting or a short piece of ductwork.
The pieces cut from the plasma cutter might get put through the beader for strengthening, and then through the seamer to make a Snaplock or Pittsburgh Seam and through a roll former to make a TDC or other type of joint depending on the requirements of the fitting or short duct section. If the fitting or duct joint requires internal lining, then this will occur before assembling.
One of the last stops in the shop will be to assemble all the pieces together into a finished fitting or short section of ductwork. If required, tie-rods will be inserted to provide support for larger fittings and duct sections. Also, external reinforcement will be added after assembly if required.
Duct Sealer will be applied to all internal seams and penetrations.
The pieces should flow efficiently through the fabrication shop to optimize time, avoiding unnecessary steps for the shop workers.
Watch this short video and look for the notches cut into the metal at the point where it will be bent. Notice also the shape of the last part cut, as it appears to be the cheek of an elbow, and the first piece will be the throat of that elbow.
Coil Line Feeding a Plasma Cutting Table
For those shop that can afford the capital to purchase a coil line dedicated to a plasma cutting table as shown in this video below, will have the ability to safe on the labor required to pull flat sheet metal stock on to the table.
Notice that the shop personnel have attached identifying stickers on each piece of sheet metal being cut. This will help in the assembly process and when material handling at the job site in order to get the right fitting in the correct location on the project. This is really helpful the larger the project is, as hunting for the correct fitting when you’re working on a large building is a big waste of time.
Now let’s look at chapter #5 to see how using a Spiral Machine can save on material waste and labor.
- Chapter #1 – Introduction to Sheet Shop Fabrication
- Chapter #2 – Sheet Metal Materials
- Chapter #3 – Sheet Metal Coil Line
- Chapter #4 – Plasma Cutting Table
- Chapter #5 – Spiral Machine
- Chapter #6 – Sheet Metal Seams
- Chapter #7 – Sheet Metal Joints
- Chapter #8 – Sheet Metal Casings and Plenums
- Chapter #9 – Sheet Metal Shop Fabrication Productivity


